Physical Address
304 North Cardinal St.
Dorchester Center, MA 02124
Physical Address
304 North Cardinal St.
Dorchester Center, MA 02124
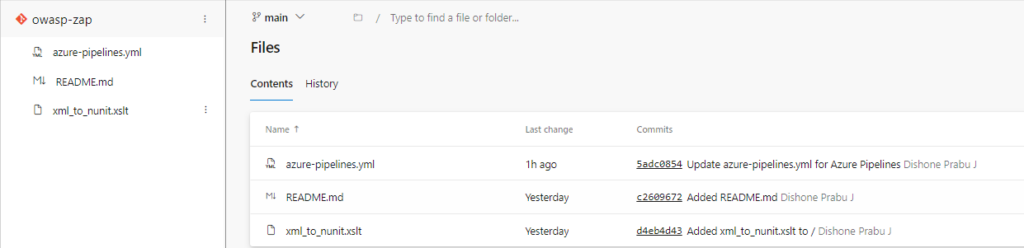
Download the file(xml_to_nunit.xslt) attached in this document and then put it into your repository
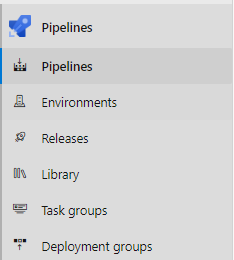
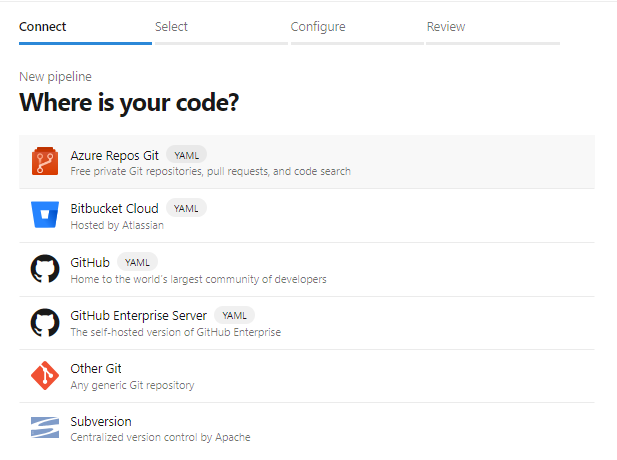
Go to the Pipelines section in Azure DevOps and then select New Pipeline
Then select Azure Repos
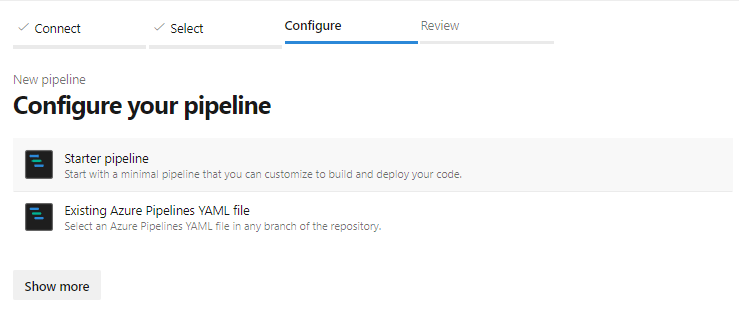
Select configure pipeline as Starter pipeline
Now delete all the things in the stater pipeline and add the below trigger and stages
trigger:
- main

stages:
- stage: 'buildstage'
  jobs:
  - job: 'buildjob'
    pool:
      vmImage: 'ubuntu-latest'
    steps:
First, you need to run your application which was containerized before in detached mode on a specific port so that the Owasp Zap scanner can perform attacks on that port and scan your app
    - bash: |
        docker run -d -p 443:80 nginx:latest
      displayName: 'Web Container'
for examlpe i am using nginx image
Now run Owasp Zap container to scan the webserver and it will generate the report in xml formate
    - bash: |
        ls
        chmod -R 777 ./
        docker run --rm -v $(pwd):/zap/wrk/:rw -t owasp/zap2docker-stable zap-full-scan.py -t http://$(ip -f inet -o addr show docker0 | awk '{print $4}' | cut -d '/' -f 1):443 -x xml_report.xml
        true
      displayName: 'Owasp Container Scan'
Now we need to convert the xml file to NUnit formate, for that we are adding additional step to convert the report
    - powershell: |
        ls
        $XslPath = "xml_to_nunit.xslt"
        $XmlInputPath = "xml_report.xml"
        $XmlOutputPath = "converted_report.xml"
        $XslTransform = New-Object System.Xml.Xsl.XslCompiledTransform
        $XslTransform.Load($XslPath)
        $XslTransform.Transform($XmlInputPath, $XmlOutputPath)
      displayName: 'PowerShell Script'
Now we are passing the report date to OWASP AZP by adding its task (Before adding this step install OWASP ZAP Scanner from the marketplace)
    - task: PublishTestResults@2
      displayName: 'Publish Test Results'
      inputs:
        testResultsFormat: 'NUnit'
        testResultsFiles: 'converted_report.xml'
Final code will be like
trigger:
- main
stages:
- stage: 'buildstage'
jobs:
- job: 'buildjob'
pool:
vmImage: 'ubuntu-latest'
steps:
- bash: |
docker run -d -p 443:80 nginx:latest
displayName: 'App Container'
- bash: |
ls
chmod -R 777 ./
docker run --rm -v $(pwd):/zap/wrk/:rw -t owasp/zap2docker-stable zap-full-scan.py -t http://$(ip -f inet -o addr show docker0 | awk '{print $4}' | cut -d '/' -f 1):443 -x xml_report.xml
true
displayName: 'Owasp Container Scan'
- powershell: |
ls
$XslPath = "xml_to_nunit.xslt"
$XmlInputPath = "xml_report.xml"
$XmlOutputPath = "converted_report.xml"
$XslTransform = New-Object System.Xml.Xsl.XslCompiledTransform
$XslTransform.Load($XslPath)
$XslTransform.Transform($XmlInputPath, $XmlOutputPath)
displayName: 'PowerShell Script'
- task: PublishTestResults@2
displayName: 'Publish Test Results'
inputs:
testResultsFormat: 'NUnit'
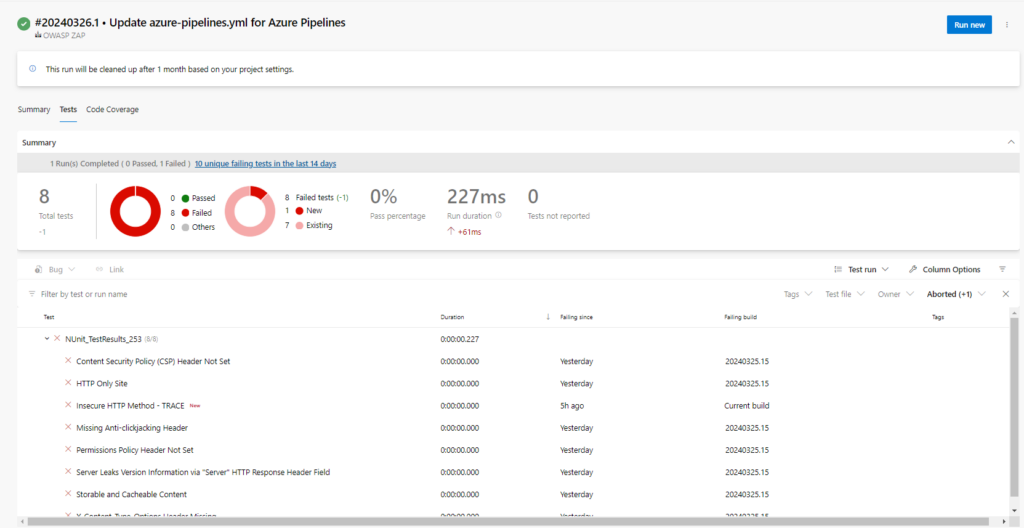
testResultsFiles: 'converted_report.xml'Here i am forwarding the 80 port to 443, based on your application need you can change the port and once the job run completed, go to the job -> select the lastest build -> and here next to the summary you can see the tests option, click on that to view the result
Good write-up. I absolutely appreciate this site.
Continue the good work!