Physical Address
304 North Cardinal St.
Dorchester Center, MA 02124
Physical Address
304 North Cardinal St.
Dorchester Center, MA 02124
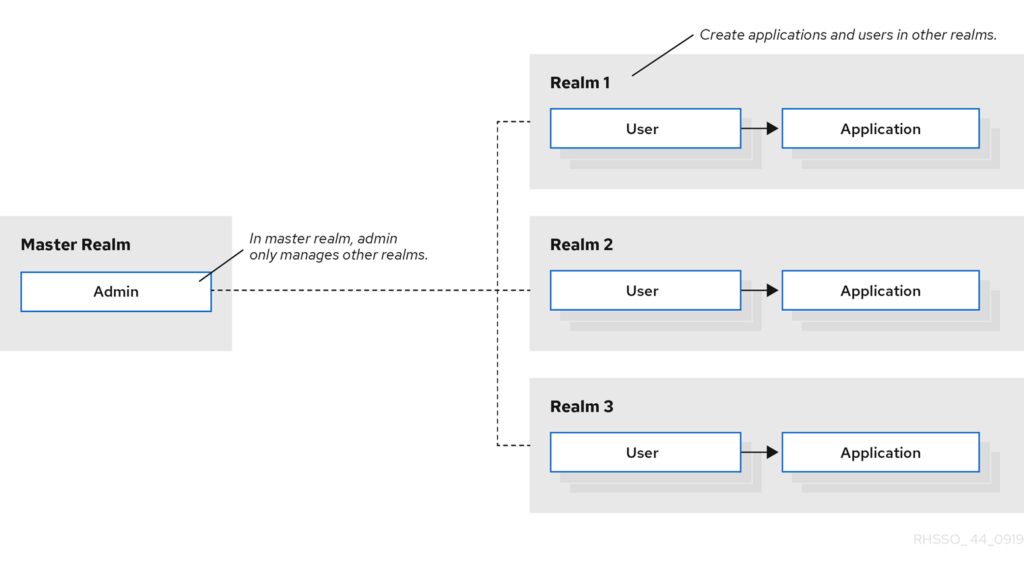
Keycloak
Portainer
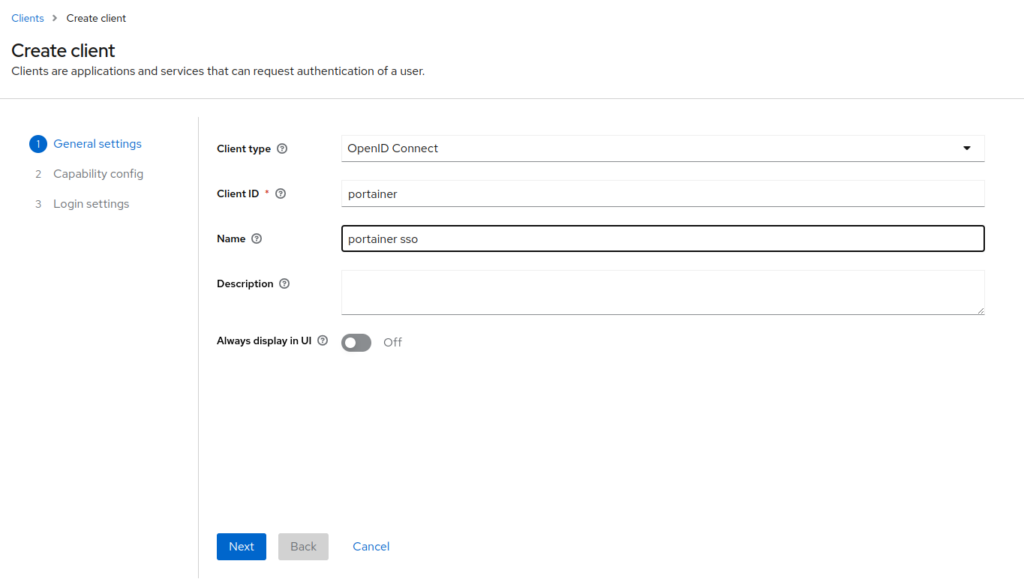
Go to the new realm -> client -> new -> OpenID Connect -> fill in the details and click next.
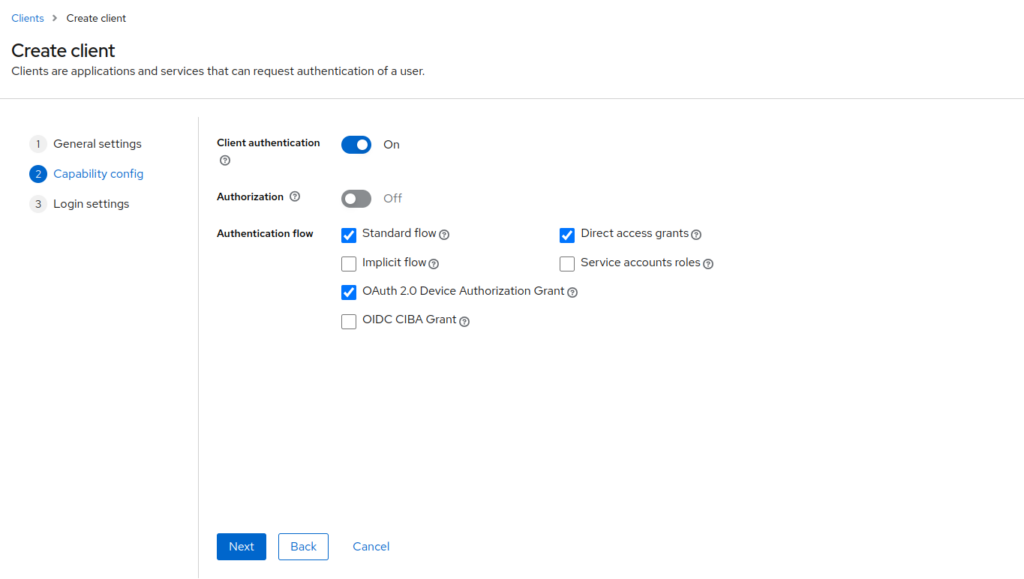
Enable client authentication and OAuth 2.0 -> Click next
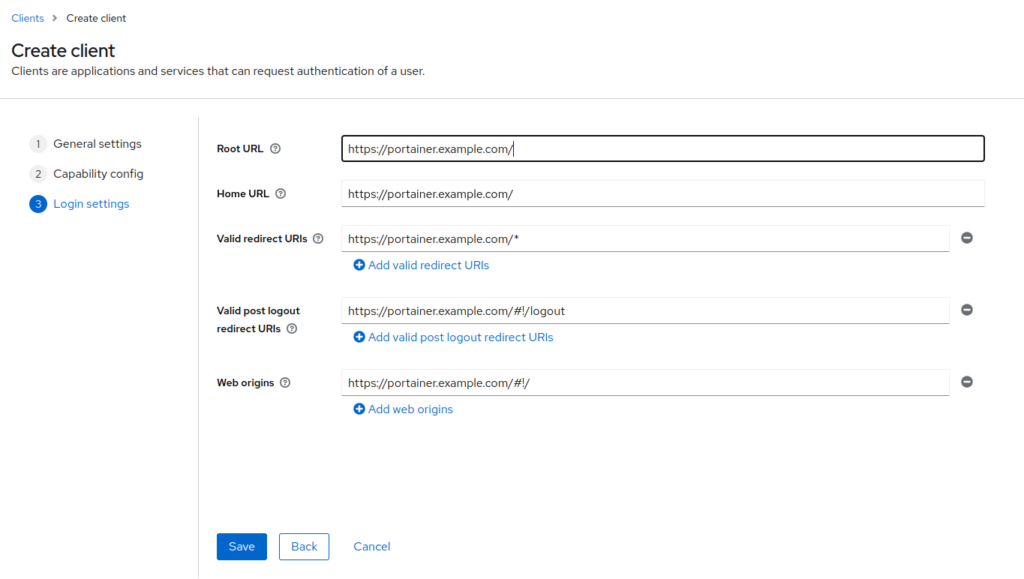
fill the URL based on your portainer URL and click save
Now get into the newly created client -> credentials -> copy the client secret and store it somewhere

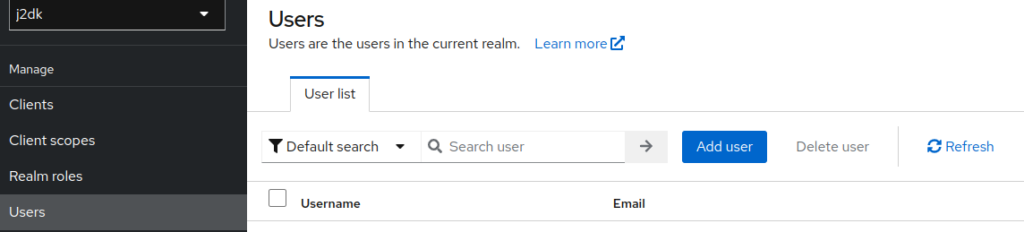
Now create a user in the realm ( portainer ) -> user -> add user and create a user
Portainer
Login to the portainer -> go to settings -> Authentication
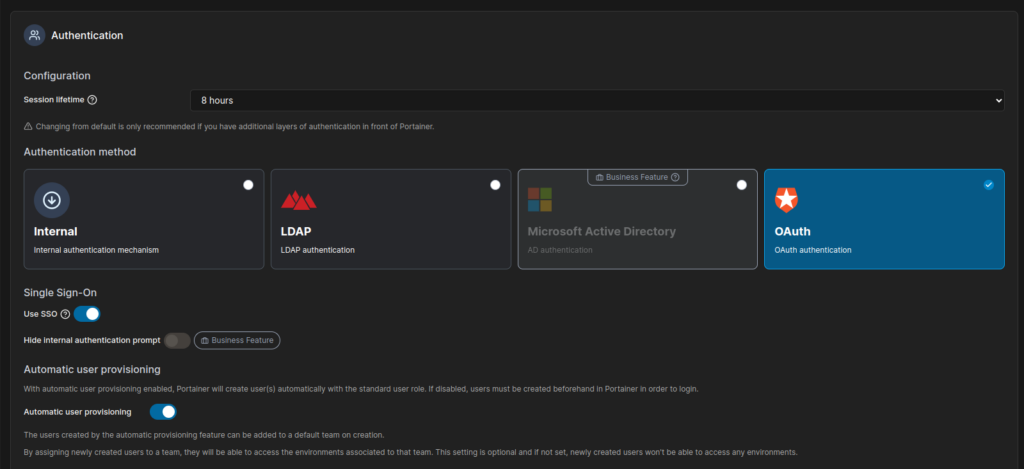

fill in the below details based on your configuration:
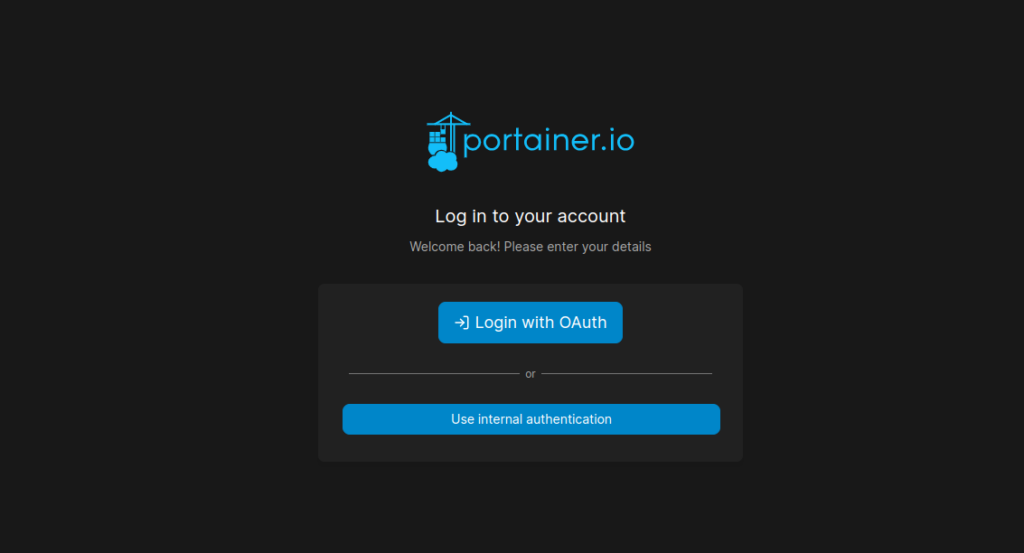
Now logout and login again to Portainer. You will see the “Login with OAuth” option displayed -> click on that and use the username and password created from Keycloak.
This description works well and helped me get things working.
A note in case anyone wants to use the configured Keycloak username instead of the email address for Portainer userid. Assuming you haven’t changed the default Keycloak user profile or scope mappings, for the “User identifier” field use “preferred_username”.