Physical Address
304 North Cardinal St.
Dorchester Center, MA 02124
Physical Address
304 North Cardinal St.
Dorchester Center, MA 02124
To Mount the blob storage as volume to Kubernetes pods
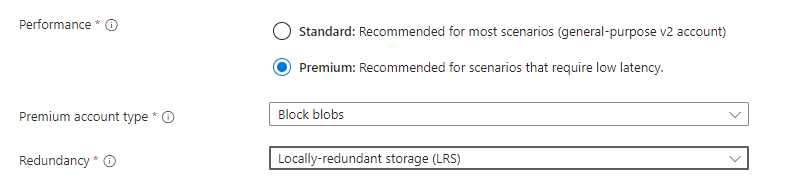
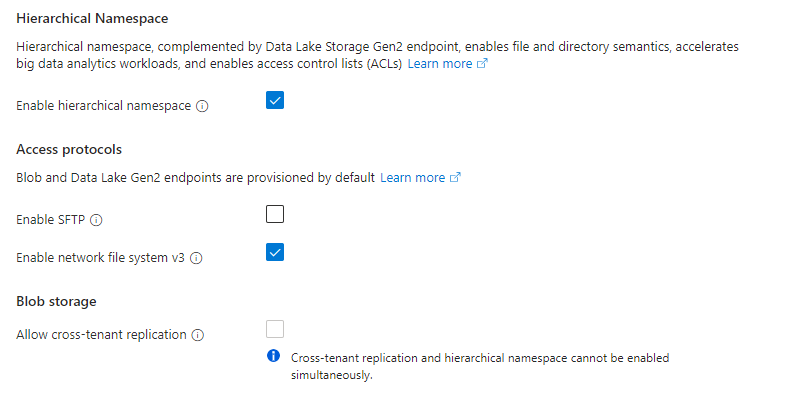
Create a premium storage account, while creating enable “network file system v3” option and create the storage account.
After creating the storage account
Go to storage account which we created now -> Containers -> New Containers ( To Create One ).
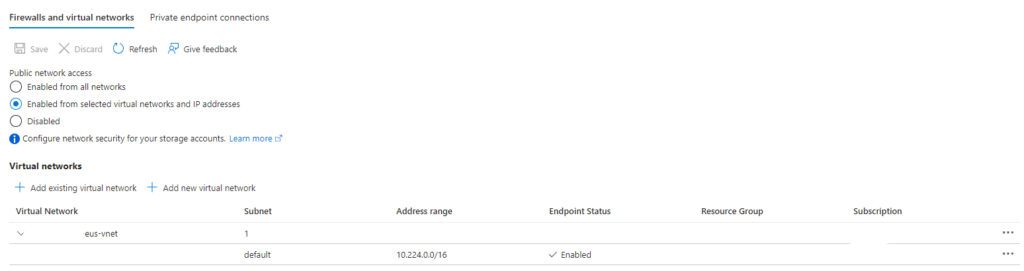
Also add the Kubernetes Vnet’s subnet to the storage account by clicking network inside the storage account
first we need to create a NFS Persistent volume
apiVersion: v1
kind: PersistentVolume
metadata:
  name: nfs-blob-pv
  labels:
    type: nfs
spec:
  capacity:
    storage: 100Gi
  accessModes:
    - ReadWriteMany
  nfs:
    server: {storage account name}.blob.core.windows.net
    path: "/{storage account name}/{blob container name}"
  mountOptions:
    - nolock
    - vers=3
    - sec=sys
    - proto=tcp
Modify the manifest based on your storage account.
kubectl apply -f PersistentVolume.yamlNow we need to create a persistent volume claim
apiVersion: v1
kind: PersistentVolumeClaim
metadata:
  name: nfs-blob-pvc
spec:
  accessModes:
    - ReadWriteMany
  storageClassName: ""
  resources:
    requests:
      storage: 10Gi
  selector:
    matchLabels:
      type: nfs
kubectl apply -f PersistentVolumeClaim.yamlNow add the PersistentVolumeClaim to your deployment