Physical Address
304 North Cardinal St.
Dorchester Center, MA 02124
Physical Address
304 North Cardinal St.
Dorchester Center, MA 02124
To deploy OpenVPN using a deployment.yaml file directly in a k3s Kubernetes cluster, follow these steps to create the necessary Kubernetes resources such as the Deployment, Service, and ConfigMap to configure and run OpenVPN.
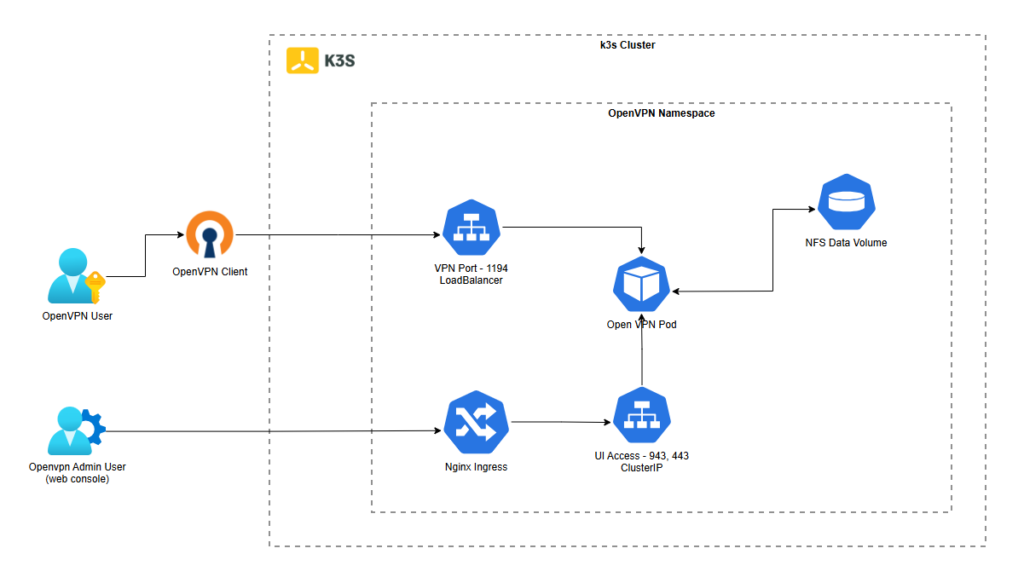
Here is the deployment.yaml for the OpenVPN server:
apiVersion: apps/v1
kind: Deployment
metadata:
  name: openvpn-as
  labels:
    app: openvpn-as
spec:
  replicas: 1
  selector:
    matchLabels:
      app: openvpn-as
  template:
    metadata:
      labels:
        app: openvpn-as
    spec:
      containers:
        - name: openvpn-as
          image: openvpn/openvpn-as
          ports:
            - containerPort: 943
            - containerPort: 443
            - containerPort: 1194
              protocol: UDP
          volumeMounts:
            - name: openvpn-data
              mountPath: /openvpn
          securityContext:
            capabilities:
              add:
                - NET_ADMIN
      volumes:
        - name: openvpn-data
          nfs:
            server: 192.168.1.120
            path: /mnt/kubernetes/volume/openvpn
            readOnly: false
To expose the OpenVPN deployment, create a Service that will allow external access to the OpenVPN server:
apiVersion: v1
kind: Service
metadata:
  name: openvpn-as-vpn
  labels:
    app: openvpn-as
spec:
  type: LoadBalancer
  selector:
    app: openvpn-as
  ports:
    - name: vpn
      port: 1194
      targetPort: 1194
protocol: UDPIn OpenVPN, UDP 1194 port is used for the following purposes:
Create another service to access the Web UI
apiVersion: v1
kind: Service
metadata:
  name: openvpn-as-web
  namespace: homelab-prod
  labels:
    app: openvpn-as
spec:
  type: LoadBalancer
  selector:
    app: openvpn-as
  ports:
    - name: web
      port: 943
      targetPort: 943
      protocol: TCP
    - name: https
      port: 443
      targetPort: 443
protocol: TCPIn OpenVPN, ports 443 and 943 are used for the following purposes:
Now, apply the Deployment, and Service:
kubectl apply -f deployment.yaml
kubectl apply -f service.yamlYou’ve installed Access Server, and the pod is running. You can now sign in to the Admin Web UI, a web-based GUI for managing your VPN server
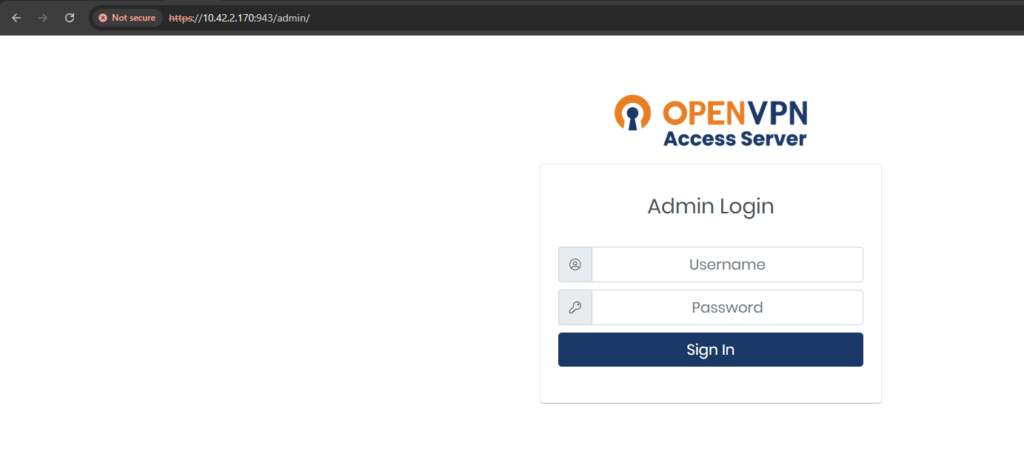
The Admin Web UI is available at https://LOAD-BALANCER-IP:943/admin.
The default user is openvpn and you can find the temporary password created with the initial Access Server configuration in the container logs:
kubectl logs -f {pod-name}
To access and sign in to the Admin Web UI:
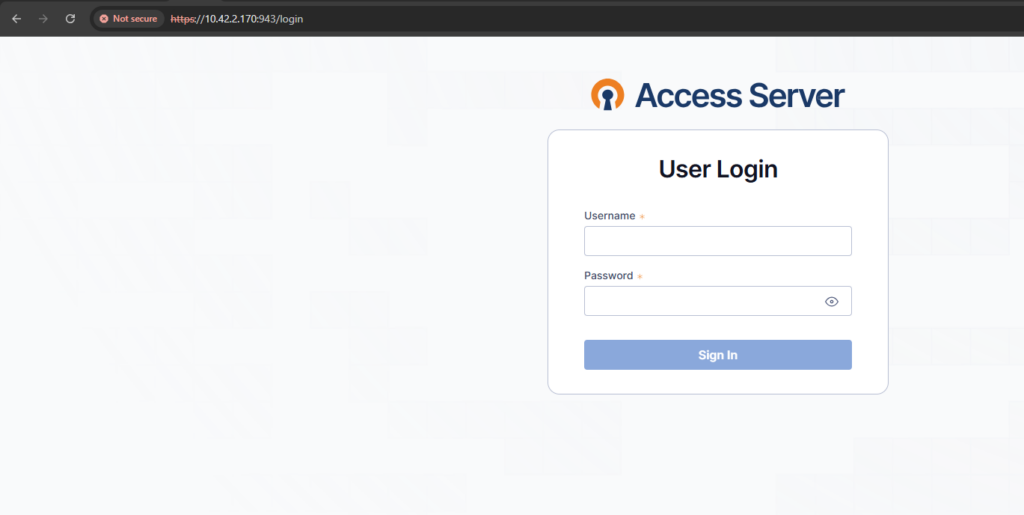
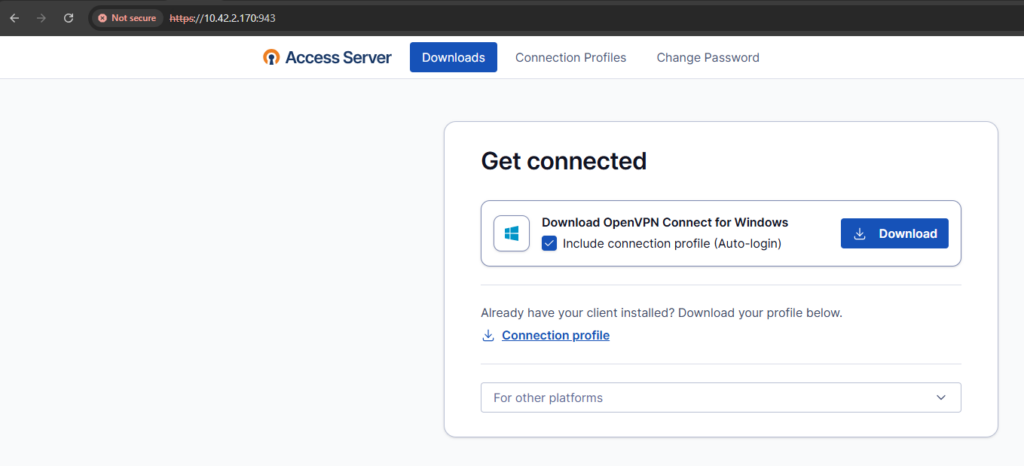
To download the Client https://LOAD-BALANCER-IP:943 and log-in with the same username and password
Once you have logged in, you will see a page like this based on your Operating System.
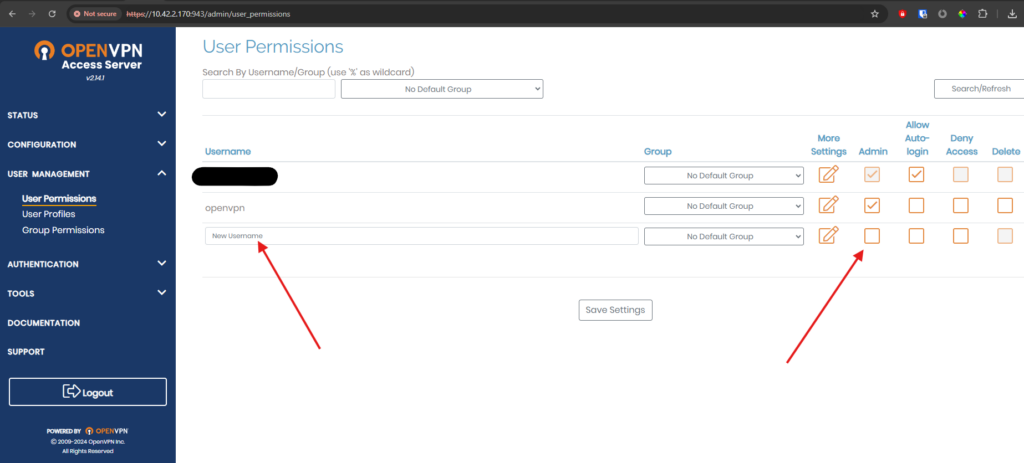
Login to the admin page -> user management -> user permissions. Type the Username which you want to create and also check the admin box if he is admin user.
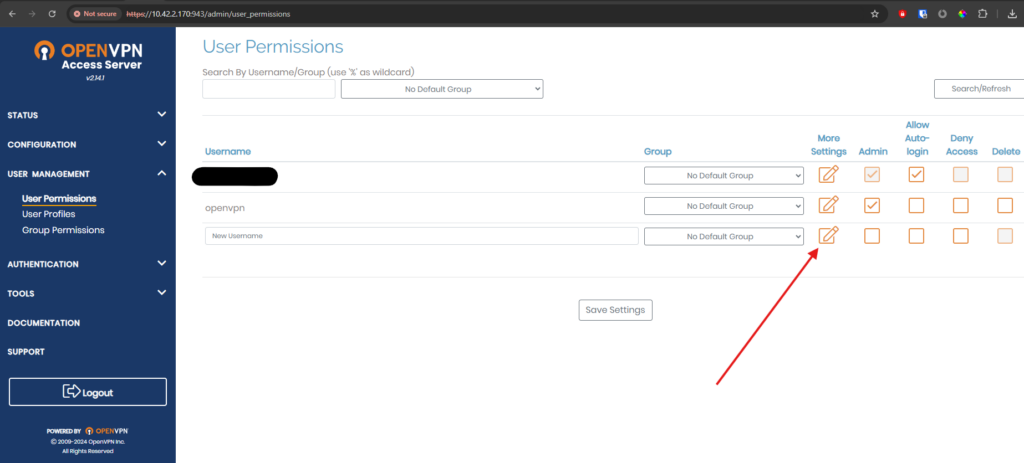
To Set the password for the user click More Settings options.
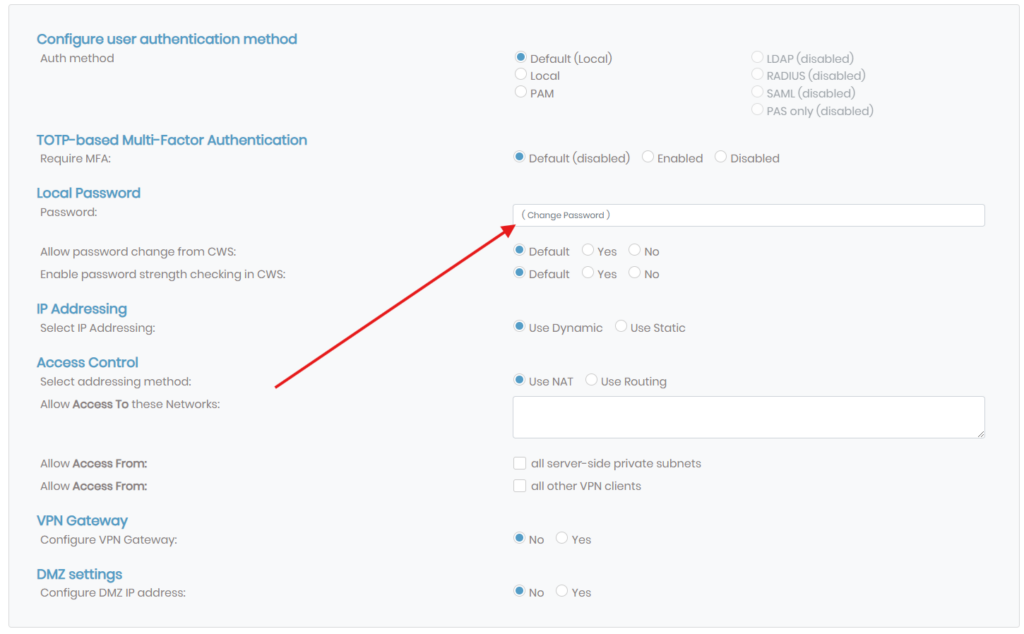
Enter the new password here, click Save Settings at the bottom of the page, and then click Update Server after saving the settings.
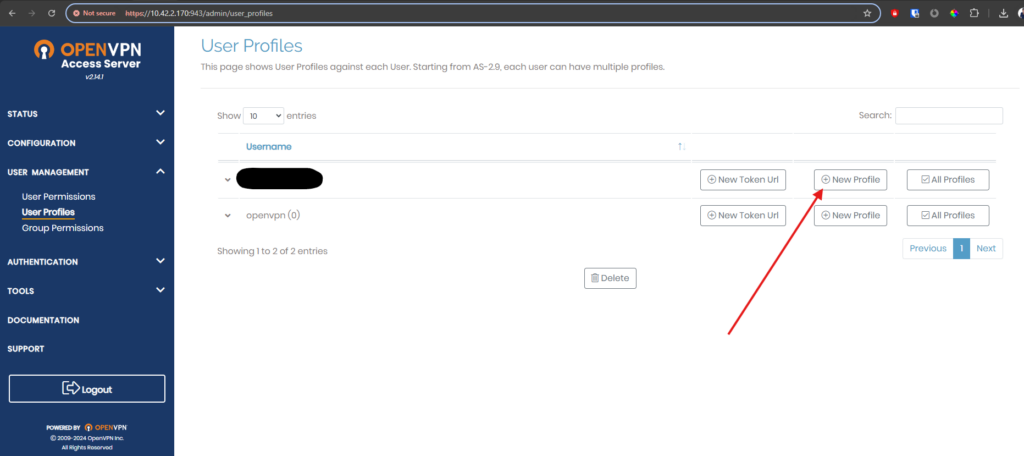
Now download the OpenVPN profile for auto connection, to do go to admin page -> user management -> user profiles -> New Profile (for the new user).
Now choose the method you want to connect with and click Create. It will download the .ovpn profile file.

Note:
Don’t forget to update the port on your router
Now edit the downloaded file and replace the IP with your public IP address wherever the IP address is mentioned.

Now we are ready to make the connection. To do this, install the OpenVPN client on your device, open it, and click on the + button.

Chose upload file

Select the file that we just edited by clicking Browse.

Click Connect to establish the connection.

We are successfully connected to the OpenVPN pod.

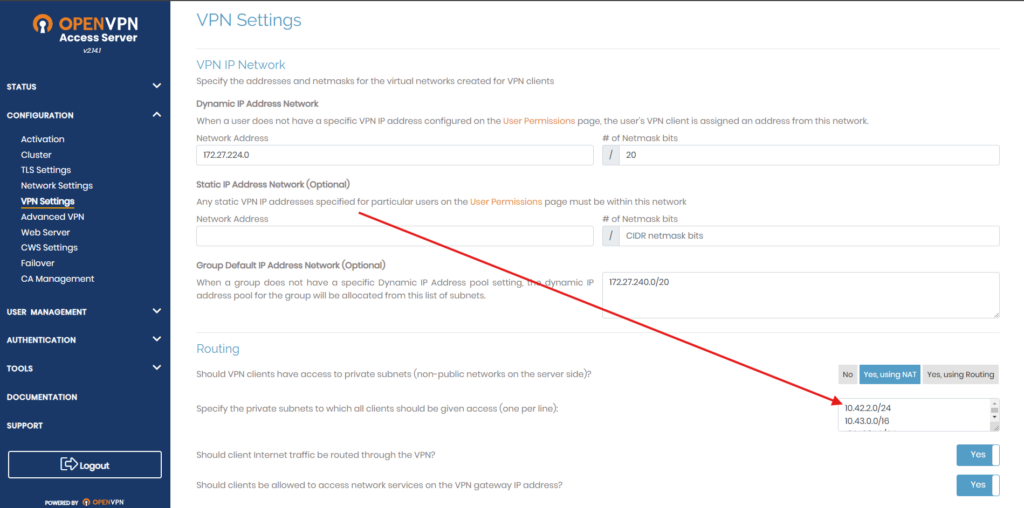
To access multiple subnets, go to the Admin page → Configuration → VPN Settings. Under Routing, add your subnet here, then save and update the server to apply the changes.
I was just searching for this info for some time. After six hours of continuous Googleing, at last I got it in your web site. I wonder what is the lack of Google strategy that do not rank this kind of informative websites in top of the list. Normally the top websites are full of garbage.
Thank you for the kind words! I’m glad you found the information you were looking for here after such a long search. It’s true that search results can sometimes miss highlighting genuinely helpful sites, but feedback like yours reminds us that sharing useful, clear content is worth the effort. If there’s anything else you’re looking for or need further details on, feel free to ask—I’m happy to help!
some genuinely great info , Sword lily I noticed this.
Never knew this, regards for letting me know.
Happy to join conversations, share thoughts, and learn something new as I go.
I like hearing diverse viewpoints and contributing whenever I can. Happy to hear fresh thoughts and building connections.
Here is my web-site:AutoMisto24
https://automisto24.com.ua/